In recent years, the popularity of large format porcelain tiles has surged. According to market reports, the large format tile segment is expected to grow by 20% over the next five years. Homeowners and designers alike appreciate their sleek look and versatility. However, many struggle with the installation process. This leads to the question, "How to install large format porcelain tiles on walls?"
Proper installation is crucial for achieving a flawless finish. Incorrect techniques can lead to tiles cracking or uneven surfaces. It is essential to consider factors such as substrate compatibility and adhesive selection. Experts recommend using a high-quality thin-set mortar for optimal results. Yet, even experienced installers can face challenges with these heavy materials.
Understanding the installation process is vital for both professionals and DIY enthusiasts. While detailed guides exist, hands-on experience remains invaluable. Learning from mistakes can foster improvement. Each project offers unique hurdles, demanding adaptability and problem-solving skills. As you explore how to install large format porcelain tiles on walls, keep in mind that practice makes perfect. The journey of mastering these techniques can ultimately enhance your skill set.
Large format porcelain tiles have become increasingly popular in contemporary design. Their expansive size and sleek appearance can transform any wall into a stunning focal point. These tiles bring a minimalist aesthetic, often making spaces appear larger and more open. The benefits of using large format tiles extend beyond their visual appeal. They are durable, water-resistant, and easy to maintain, which makes them an excellent choice for both residential and commercial spaces.
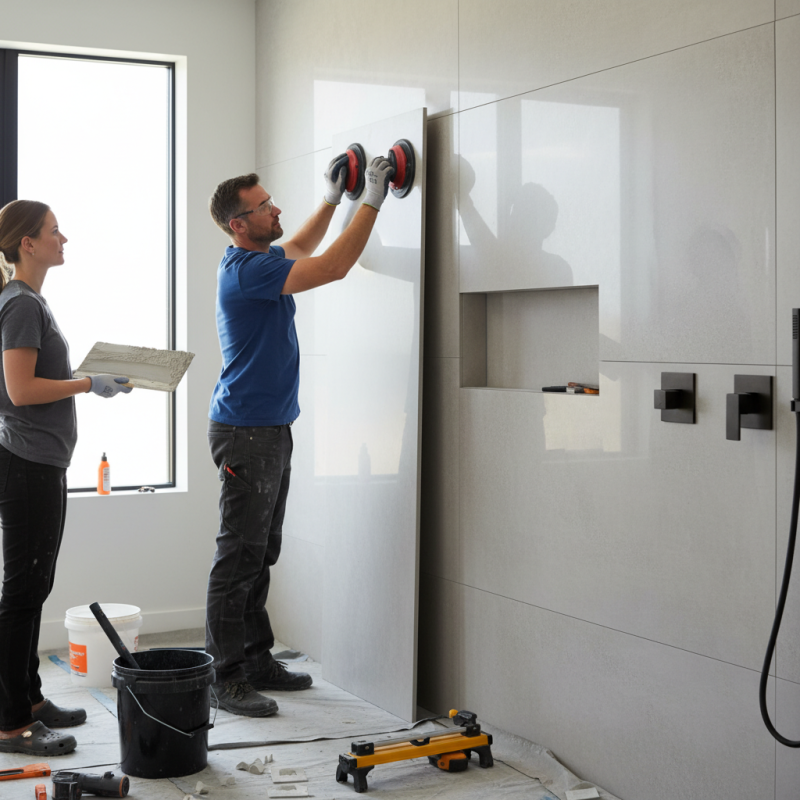
Installing large format porcelain tiles can be a challenge due to their size and weight. Proper tools and techniques are essential for a successful installation. Ensure that the wall surface is perfectly prepared. Any imperfections can lead to uneven tile placement. This is where experience plays a crucial role. Using appropriate thin-set mortar and allowing adequate curing time helps achieve a flawless finish. Even small mistakes in the tiling process can lead to noticeable flaws, emphasizing the need for careful planning and execution.
Additionally, large format tiles can be heavy and cumbersome to handle. It's often advisable to have a second person on hand during installation. This not only makes the process easier but also allows for better alignment and placement. Reflecting on the installation experience can lead to better outcomes in the future. Each project presents unique challenges, and learning from them is vital. Embracing the imperfections in the process can improve expertise over time.
Installing large format porcelain tiles can seem daunting, but having the right tools and materials is crucial for success. Essential tools include a high-quality tile cutter, leveling system, and a notched trowel. A recent industry report indicates that using a leveling system can reduce tile lippage by up to 90%, ensuring a smooth finish. Choosing a thin-set adhesive specifically designed for large tiles is equally important. It provides better support and helps avoid sagging during installation.
In addition to tools, gather necessary materials beforehand. Ensure you have spacers to maintain consistent grout lines. Grout choice matters too; use a flexible grout to accommodate slight movements. Industry experts recommend a minimum tile thickness of 10mm for wall installations to enhance durability. While it's tempting to rush through the process, taking time on surface preparation is vital. Deviating from this step can lead to misalignment or cracking, requiring rework that extends timelines. Following these guidelines not only improves aesthetics but also longevity of the installation.
| Tool/Material | Description | Recommended Size | Purpose |
|---|---|---|---|
| Tile Cutter | A tool used to cut tiles to the desired size. | Manual or Electric | Cutting tiles for a perfect fit. |
| Leveling Clips | Helps to level tiles for a flat surface. | Varied sizes | Ensures even tile installation. |
| Notched Trowel | Used to spread thin-set mortar evenly. | 1/4" - 1/2" notch | Applying adhesive for tiles. |
| Thin-set Mortar | Adhesive used to attach tiles to surfaces. | As per tile size | Bonding tiles to the wall. |
| Spacers | Keeps uniform gaps between tiles. | 1/16" - 1/8" | Ensures consistent grout lines. |
| Rubber Mallet | Used to gently tap tiles into place. | 16 oz | Setting tiles without damage. |
Preparing the wall surface correctly is crucial for a successful installation of large format porcelain tiles. According to industry reports, improperly prepared surfaces account for nearly 30% of tile failure. A smooth, flat surface ensures even adhesion and reduces the risk of cracks forming later.
Begin by cleaning the wall thoroughly. Remove dust, grease, or any old adhesive. Checking the wall for moisture is essential. High humidity can lead to tile issues down the road. Use a level to ensure the wall is flat. A slight bump may result in uneven tile spacing.
Tips: Always use a tile leveling system for large formats. This helps mitigate any wall imperfections. Also, consider using a polymer-modified thin-set mortar, which provides better bonding and flexibility.
Once the wall is clean and inspected, the next step is priming. A good primer can improve adhesion significantly. Consult with a professional for the right product. They are knowledgeable about the specific conditions of your installation area. Remember, even minor flaws can lead to major problems later on. Assessing and preparing the wall is not a step to overlook.
This chart illustrates the time allocated for each step involved in installing large format porcelain tiles on walls. Proper surface preparation takes the most time, followed by the actual tile placement process.
Installing large format porcelain tiles on walls can be a rewarding project. It requires careful preparation and attention to detail. Start by choosing the right tiles. Ensure they are suited for vertical application. Heavy tiles can be challenging to lift and position. You may want a helper during installation.
Prepare your wall surface. It should be clean and dry. If there are any imperfections, fix them before beginning. Apply the adhesive evenly using a notched trowel. This step is crucial. Using the wrong amount of adhesive can lead to problems later. Make sure to follow the manufacturer's guidelines for application.
When placing the tiles, apply gentle pressure. Each tile should make contact with the adhesive. Align them correctly to avoid gaps. Use spacers to maintain even spacing between tiles. This can be tricky. Adjust as needed until everything is level. Take your time with this process. Rushing can lead to misalignment and frustration. After installation, allow adequate time for the tiles to set before grouting. Always double-check your work. It's better to correct mistakes early.
When installing large format porcelain tiles on walls, grouting is a crucial step that can define the overall look. Choosing the right grout is vital. Use a high-quality grout that matches your tile. This enhances the aesthetics while ensuring durability. Next, consider the grout joint width. Wider joints can create a more dramatic look but may require more precision in application.
Applying grout requires technique and patience. Start with small sections to avoid a messy application. Use a grout float to press the mixture into the joints, ensuring all gaps are filled. Wipe excess grout off the tiles while it's still wet. This moment can be tricky; if you wait too long, the grout can harden, making cleanup harder.
Taking time to finish the grout lines is equally important. Use a damp sponge to smooth out the joints for a cleaner appearance. Keep checking for consistency. If the grout starts to set unevenly, it can lead to an unappealing finish. Regularly evaluate your progress. Embrace any imperfections; they often add character to your project. With careful attention, you can achieve stunning results and enhance your walls beautifully.
: They are large tiles that provide a sleek and minimalist aesthetic, often enhancing spatial perception.
They are durable, water-resistant, and easy to maintain, suitable for various spaces.
Improper surfaces can cause up to 30% of tile failures. A flat, clean surface is essential.
Clean the wall, check for moisture, and ensure it is even using a level.
A tile leveling system is recommended to address wall imperfections and ensure even spacing.
It offers superior bonding and flexibility, enhancing the overall installation quality.
Reflecting on past projects and learning from mistakes can enhance future outcomes.
No, having a partner helps with alignment and makes handling easier.
Minor flaws can lead to major tiling problems, affecting the aesthetics and durability.
Experience ensures a successful process, reducing the likelihood of noticeable errors during the project.
When considering how to install large format porcelain tiles on walls, it's essential to first understand the unique properties and benefits of these tiles, which include durability and aesthetic appeal. The installation process requires specific tools and materials, so gathering everything needed beforehand can make a significant difference.
Properly preparing the wall surface is crucial to ensure a smooth installation. The step-by-step installation process involves precise measurements, the application of adhesive, and careful positioning of the tiles. Finally, tips for finishing and grouting the tiles will help achieve a professional look and long-lasting results. By following this comprehensive guide, anyone can learn how to install large format porcelain tiles on walls with confidence.
Aura Stone