Polished marble can reflect window light beautifully, yet its shine is not permanent. Daily footsteps, grit, acidic spills, and unsuitable cleaners gradually soften that mirror-like surface. How to maintain the shine on polished marble floors begins with controlling these small sources of wear, not simply adding more polish.
The Natural Stone Institute’s Dimension Stone Design Manual, Version VIII, identifies marble as a calcium-carbonate stone that can react with acidic substances. Its guidance supports pH-neutral cleaning, prompt spill removal, and regular dust removal. ASTM C1353 also demonstrates why surface performance matters: polished stone is evaluated through abrasion resistance, not appearance alone. A floor may look clean while microscopic scratches scatter light. That detail is easy to miss.
Stone-care expert Fred Hueston has stated, “Prevention is always less expensive than restoration.” This principle remains practical in 2026. A 2024 report from the International Facility Management Association also highlights the operational value of preventive maintenance, helping facilities reduce avoidable repair costs and extend asset life. However, reports cannot replace observation. Marble from different quarries can respond differently, even under similar cleaning routines.
Imagine a lobby entrance after rain. Grit sits beneath a visitor’s shoe, then moves across the floor like fine sandpaper. Entrance mats, soft microfiber dusting, diluted neutral cleaner, and scheduled professional honing can interrupt that damage. Over-polishing may create buildup or an uneven reflection. More shine is not always better. The strongest maintenance plan combines measured cleaning, careful inspection, and restraint.
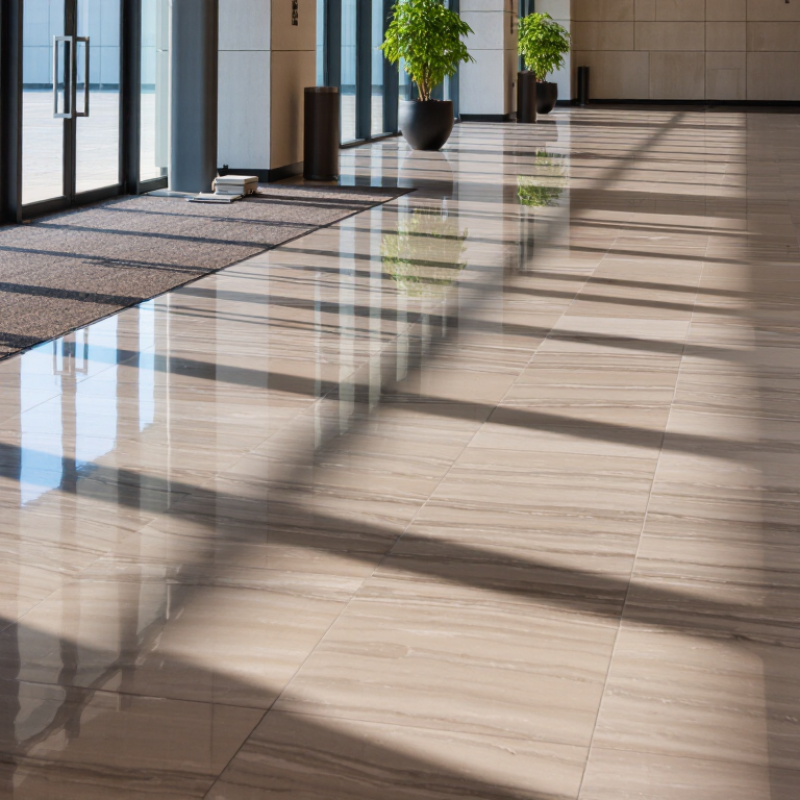
2026 Top Tips: How to Keep Polished Marble Floors Shiny?
Before reaching for polish, identify the stone. Most marble is calcite-rich, while some darker varieties contain more dolomite. Some products sold as marble are actually limestone or engineered stone. They need different care. A hidden-area test can show whether water darkens the surface or cleaner leaves a cloudy film. Record the result. That small step prevents expensive mistakes.
Identify the finish as well. Polished marble reflects light sharply, while honed marble looks soft and matte. Brushed finishes contain visible texture and should not be forced to shine. I once blamed dullness on weak sealer. That assumption was wrong. Sealer protects against staining, but it does not restore reflection. Dullness often comes from acidic spills, gritty soil, hard-water residue, soap film, or abrasive cleaning pads. Tiny scratches scatter light across the floor.
Use a pH-neutral stone cleaner and a clean microfiber mop. Rinse when residue appears. Dry the floor, especially near entrances and kitchens. Grit under footwear acts like fine sandpaper. Place absorbent mats at doorways, but avoid rubber backings that may trap moisture. If the surface feels rough or shows widespread etching, stop experimenting. A qualified stone restoration professional can measure the finish and select suitable diamond abrasives. Even then, I would request a small sample area first; lighting can make a repaired patch appear different from the surrounding marble.
Identify the marble type, recognize the finish, and prevent the causes of dullness.
Lower pH means greater acidity. Calcite-rich marble is especially sensitive to acidic liquids, which can chemically etch the surface and make a polished floor look dull. Lemon juice and vinegar should be cleaned up immediately, while pH-neutral cleaning solutions are safer for routine care.
Identify the finish: polished marble has a reflective surface, honed marble has a smooth matte appearance, and tumbled marble has a textured, softened edge. A dull appearance may result from acid etching, abrasive grit, soap residue, or wear rather than from the marble type alone.
Best practice: dust-mop regularly with a clean, non-abrasive pad, wipe spills promptly, use a stone-safe neutral cleaner, and avoid abrasive powders, acidic products, and harsh scrubbing.
2026 Top Tips: How to Keep Polished Marble Floors Shiny?
Dust and grit are not harmless. They act like fine sandpaper under shoes, carts, and furniture. The U.S. Environmental Protection Agency reports that indoor pollutant levels can be two to five times higher than outdoor levels. Much of that material settles on floors. On polished marble, tiny mineral particles can create dull traffic lanes before damage becomes obvious.
Tip: Remove grit before wet cleaning. Use a clean, soft microfiber dust mop each day in busy areas. Vacuum with a hard-floor setting and a non-abrasive attachment. Avoid dragging the vacuum head across the stone. Dry first. Less grit, less damage.
Place absorbent mats at entrances, but inspect them often. A saturated or dirty mat can spread grit instead of trapping it. The Natural Stone Institute recommends routine dust removal and pH-neutral care for natural stone. Its technical guidance also warns against acidic cleaners, which may etch calcium-based marble. ASTM C1353/C1353M uses standardized abrasive wear testing, supporting the need to control repeated surface friction.
Tip: Clean spills quickly with a soft cloth. Do not scrub aggressively. A damp microfiber mop can remove remaining residue after loose particles are gone. I would not rely on one cleaning schedule for every building. Rainy entrances, pets, and renovation dust change the risk. Check the floor under side lighting. It often reveals scratches that overhead lights hide.
2026 Top Tips: How to Keep Polished Marble Floors Shiny
Clean Marble Safely with a pH-Neutral Solution
Polished marble needs gentle cleaning because its surface reacts badly to acids and harsh chemicals. Use a pH-neutral stone solution diluted according to its label. A neutral pH helps remove dust and light soil without attacking the marble’s finish. Avoid vinegar, lemon juice, abrasive powders, and chlorine-based cleaners. They may leave dull patches or weaken the surface over time.
Start by removing grit with a soft dust mop or clean vacuum attachment. Small sand particles can scratch marble during mopping. Mix the solution with lukewarm water, then use a clean microfiber mop. The mop should feel damp, not wet. Standing water can enter joints and leave cloudy marks. Work in small sections, rinsing the mop often. Do not let dirty water dry on the floor.
Dry the surface with a soft towel after cleaning. This simple step reduces streaks and reveals missed residue. Test the solution in a hidden corner before treating the whole room. I once assumed a “gentle” cleaner was safe, but the floor became hazy after repeated use. That mistake changed my routine. Read the pH information carefully, and follow the dilution instructions. If dullness remains, stop scrubbing. A stone-care professional can check whether the finish needs polishing instead of more cleaning.
Polishing and buffing can bring back the reflective shine of a dull marble floor. Start by removing dust and grit with a soft microfiber mop. Small particles can create fine scratches during polishing. Clean the surface with a pH-neutral stone cleaner, then let it dry completely.
Inspect the floor under bright side lighting. Hazy areas may need polishing, while deep scratches or white etching often require professional restoration. Use a suitable polishing powder or diamond polishing pad, following its instructions carefully. Work in small sections with slow, overlapping passes. Keep the pad moving. Excess pressure can create uneven gloss or heat marks. I once rushed a corner and produced a cloudy patch, so patience matters more than speed. The floor looked better, but not perfect.
Tips: Test a hidden corner first. Use clean water sparingly. Change dirty pads quickly. After polishing, buff the marble with a dry, soft pad until the surface feels smooth and reflects nearby light. Check the floor from several angles, especially near windows. A slight haze can remain if residue dries on the stone. Remove it gently rather than adding more polish. Deep damage should not be concealed with repeated buffing. It usually becomes more noticeable later.
| Care Dimension | Recommended Practice | Useful Data or Setting | Suggested Frequency | Why It Helps Restore Shine |
|---|---|---|---|---|
| Daily Dust Removal | Use a clean microfiber dust mop or a soft-bristled vacuum attachment. | Avoid abrasive grit, sand, and unapproved hard-bristle tools. | Daily in busy areas; at least 2–3 times per week elsewhere. | Removes particles that can create fine scratches and gradually scatter reflected light. |
| Routine Cleaning | Damp-mop with a pH-neutral stone cleaner and clean water. | Use a cleaner close to pH 7–8; never leave standing water on the floor. | As needed, commonly 1–3 times per week. | Removes soil and residue without the acid damage associated with vinegar or citrus cleaners. |
| Spill Response | Blot spills promptly with a soft absorbent cloth, then rinse lightly if required. | Respond immediately to acidic liquids, including wine, fruit juice, and soft drinks. | Immediately after every spill. | Limits etching, dull spots, and stains that cannot be removed by ordinary buffing. |
| Surface Inspection | Check for scratches, etching, worn traffic lanes, lippage, and loose grout. | Inspect under bright, low-angle light before polishing. | Before every restoration or polishing session. | Identifies damage that requires honing or repair rather than simple spray buffing. |
| Pre-Cleaning Before Polishing | Deep-clean the floor and allow it to dry completely before using polishing powder or a polishing pad. | The surface should be free of grit, grease, and visible moisture. | Before each polishing session. | Prevents residue and abrasive particles from being worked into the marble surface. |
| Honing for Dull or Scratched Areas | Use progressively finer diamond abrasives only when the surface has scratches or etching. | Typical progression: approximately 400, 800, and 1,500 grit, followed by polishing. | As needed; not part of daily maintenance. | Levels superficial damage and creates a uniform surface ready for reflective polishing. |
| Polishing | Apply a marble-compatible polishing compound or use a suitable polishing pad with controlled moisture. | Work in small sections, commonly about 0.5–1 m², to maintain consistent results. | When the finish becomes visibly hazy or loses clarity. | Refines the surface and increases the uniform reflection of light. |
| Buffing | Buff the polished surface with a clean, non-abrasive pad using overlapping passes. | Use the machine speed specified for the pad; many floor machines operate around 1,000–1,500 rpm. | After polishing and during periodic appearance maintenance. | Removes light haze and evens out the reflective finish without aggressive material removal. |
| Buffing Technique | Keep the machine moving and make overlapping passes at a steady pace. | Do not hold the pad in one place or allow excessive heat buildup. | Every time mechanical buffing is performed. | Reduces swirl marks, uneven gloss, pad lines, and localized burnishing. |
| Drying and Residue Removal | Remove slurry and polishing residue, then dry the floor with clean microfiber cloths or air movement. | Keep the floor free of foot traffic until it is dry and residue-free. | After every wet cleaning or polishing treatment. | Prevents dull films, water marks, and streaks from masking the reflective finish. |
| Traffic Protection | Place absorbent mats at entrances and use felt pads under movable furniture. | Choose mats with non-staining, non-rubber backings approved for natural stone. | Maintain continuously; clean mats regularly. | Reduces abrasive soil, sliding scratches, and premature wear in high-traffic zones. |
| Professional Assessment | Have severe etching, deep scratches, uneven slabs, or large stained areas assessed by a qualified stone-care professional. | Test any polishing method first in a small, inconspicuous area. | When routine cleaning and buffing no longer restore the appearance. | Prevents unsuitable abrasives, acids, or sealers from causing permanent surface damage. |
Sealing protects marble, but it does not create a permanent shield. The Natural Stone Institute’s Dimension Stone Design Manual explains that sealers improve stain resistance, not scratch resistance. ASTM C97 also measures stone absorption by percentage of dry weight, showing why different marble slabs need different treatments. Test the sealer on an unseen corner first. Add a few drops of water and check after ten minutes. Darkening suggests absorption and a possible need for resealing.
Use a breathable impregnating sealer suited to polished marble. Avoid thick topical coatings, which may yellow, trap moisture, or leave uneven gloss. High-traffic entryways often need inspection every six to twelve months. Lower-traffic rooms may need longer intervals. Keep a simple log with dates, water-test results, and visible wear. It sounds excessive. It prevents guessing.
Daily care matters more than occasional polishing. Place grit-trapping mats outside entrances, then sweep with a soft microfiber tool. Sand behaves like tiny glass fragments under shoes. Clean spills immediately with a pH-neutral stone cleaner and a damp cloth. Never use vinegar, lemon juice, or abrasive powder. I still see one common mistake: polishing over dirty marble. That can press grit into the surface and create dull tracks. Regular cleaning should remain gentle, measured, and slightly boring. That is usually safer.
Dust and grit act like fine sandpaper under shoes, carts, and furniture. Remove them daily in busy areas. Less grit, less wear.
Use a clean, soft microfiber dust mop or a vacuum set for hard floors. Choose a non-abrasive attachment. Do not drag the vacuum head across the marble.
Blot spills quickly with a soft cloth. Remove loose particles before wiping. Use a damp microfiber mop, then dry the area thoroughly.
Use a pH-neutral stone cleaner diluted according to its label. Apply it with lukewarm water and a clean, damp microfiber mop. The mop should not drip.
Avoid vinegar, lemon juice, abrasive powders, and harsh chlorine-based cleaners. They can etch marble or create dull patches. Do not scrub aggressively.
Standing water can enter joints and leave cloudy marks. Dry the surface with a soft towel. This also exposes leftover residue and streaks.
Absorbent, grit-trapping mats can reduce tracked dirt near entrances. Inspect them often, because dirty mats may spread grit instead. Rainy days require closer attention.
High-traffic entrances may need inspection every six to twelve months. Quieter rooms may need longer intervals. Test an unseen corner first.
No. Sealing improves stain resistance, but it does not create a scratch-proof surface. Choose a breathable impregnating sealer made for polished marble.
Stop scrubbing harder. Check the floor under side lighting, where hidden scratches may appear. I once trusted a gentle cleaner, but repeated use left haze. Cleaning was not the real solution.
Keeping polished marble floors shiny begins with understanding the marble type, surface finish, and reason for dullness. Dust, sand, and grit should be removed regularly with a soft dust mop or vacuum attachment, since small particles can cause fine scratches when walked on. Clean the floor with a soft microfiber mop and a pH-neutral solution made for natural stone. Avoid acidic or abrasive cleaners, which may etch the marble and reduce its reflective appearance.
To restore shine, polish and buff the surface with suitable non-abrasive tools, using gentle, even movements. If the floor looks cloudy, scratched, or uneven, professional refinishing may be necessary. Applying a suitable sealer can help protect the marble from stains and moisture, although sealing does not replace daily care. The best approach for How to maintain the shine on polished marble floors is to wipe spills promptly, use protective mats and furniture pads, and follow a consistent cleaning and maintenance routine.

Aura Stone